Share this on:
What You'll Learn
Integrating Jenkins, Bitbucket, and Astronomer for Automated Airflow Deployments
This guide provides a comprehensive walkthrough for creating an enterprise-grade CI/CD pipeline on AWS EC2 that integrates Jenkins with Bitbucket and Astronomer. By following these steps, you’ll establish an automated workflow that takes your Apache Airflow DAGs from code commit in Bitbucket through testing in Jenkins to production deployment in Astronomer with minimal manual intervention.
This setup is ideal for data engineering teams looking to implement DevOps best practices for their Airflow workflows, ensuring consistent, testable, and reliable deployments with proper version control.
-
Step 1: Set Up EC2 Instances
Create and configure AWS EC2 instances to host your Jenkins environment
-
Step 2: Set Up Jenkins Master
Install and configure the main Jenkins server with necessary dependencies
-
Step 3: Set Up Jenkins Agent
Prepare the build agent with Docker and Astronomer tools
-
Step 4: Set Up Integration
Connect Jenkins with Bitbucket and Astronomer services
-
Step 5: Create and Configure Pipeline
Define the CI/CD pipeline that automates deployment
Step 1: Set Up EC2 Instances
1. Create EC2 Instances:
- One for the Jenkins Master.
- One for the Jenkins Agent.

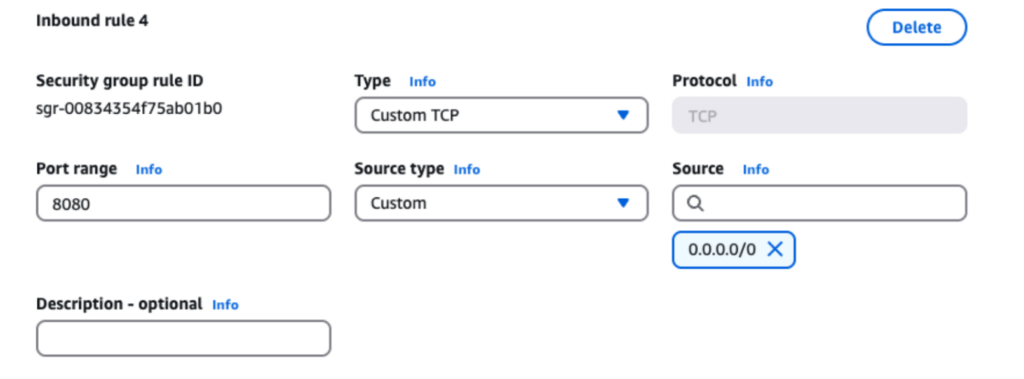
2. Make sure to check the following security group options while creating instances.
- Checking the following three options:
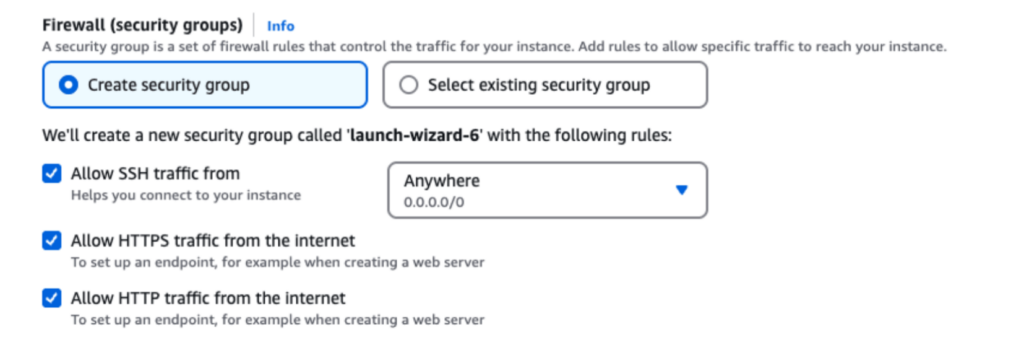
- EC2 > Security Groups > sg-05e613f5b3e9f6401 - launch-wizard-1 > Edit inbound rules
- Add rules to allow HTTP (port 80) and Jenkins (port 8080) traffic
Step 2: Set Up Jenkins Master
1. Install Java (Use command line on EC2)
					# Update package lists for upgrades and new package installations
sudo apt update

# Install fontconfig and OpenJDK 17 JRE (Java Runtime Environment)
sudo apt install fontconfig openjdk-17-jre

# Verify Java installation by checking the version
java -version
2. Install Jenkins
					# Download the Jenkins repository key and save it to the keyring directory
sudo wget -O /usr/share/keyrings/jenkins-keyring.asc https://pkg.jenkins.io/debian-stable/jenkins.io-2023.key

# Add the Jenkins repository to the sources list with the keyring for verification
# The output is redirected to /dev/null to keep the terminal clean
echo "deb [signed-by=/usr/share/keyrings/jenkins-keyring.asc] https://pkg.jenkins.io/debian-stable binary/" | sudo tee /etc/apt/sources.list.d/jenkins.list > /dev/null

# Update package lists to include the Jenkins repository
sudo apt-get update

# Install Jenkins from the repository
sudo apt-get install jenkins
3. Check if Jenkins installed correctly and configure to start in on boot of EC2
					# Check if Jenkins service is running properly
sudo systemctl status jenkins

# Start the Jenkins service and configure it to start on boot
sudo systemctl enable jenkins
4. Create SSH keys for secure communication between Master and Agent:
					# On Master: Navigate to SSH directory
cd ~/.ssh

# Generate SSH key pair (public key will be shared with the Agent)
ssh-keygen
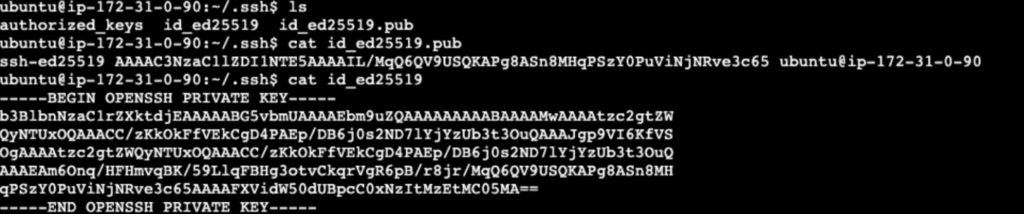
Note: The private key remains on the Master instance while the public key will be used on the Agent.
5. Complete Jenkins Setup
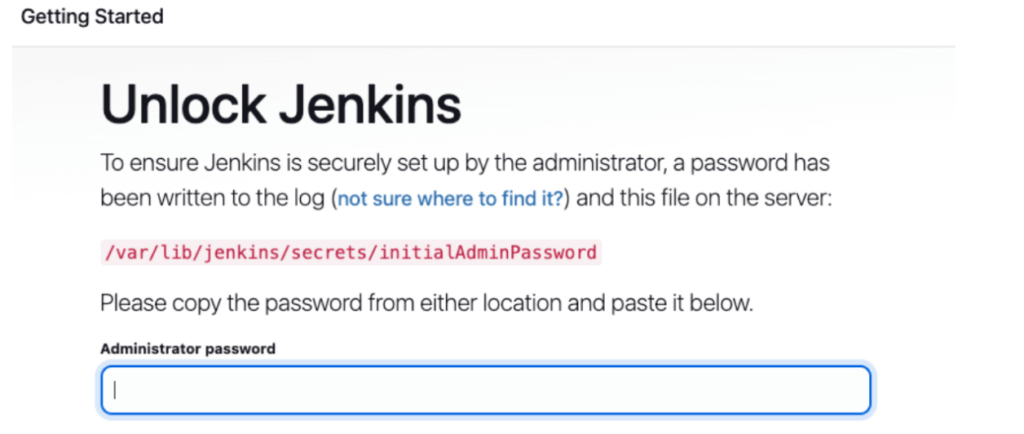
- Access the Jenkins web interface by navigating to http://:8080 in your browser
- Retrieve the initial admin password from the server:
					# View Jenkins password string
sudo cat  /var/lib/jenkins/secrets/initialAdminPassword
- Create your administrator username and password
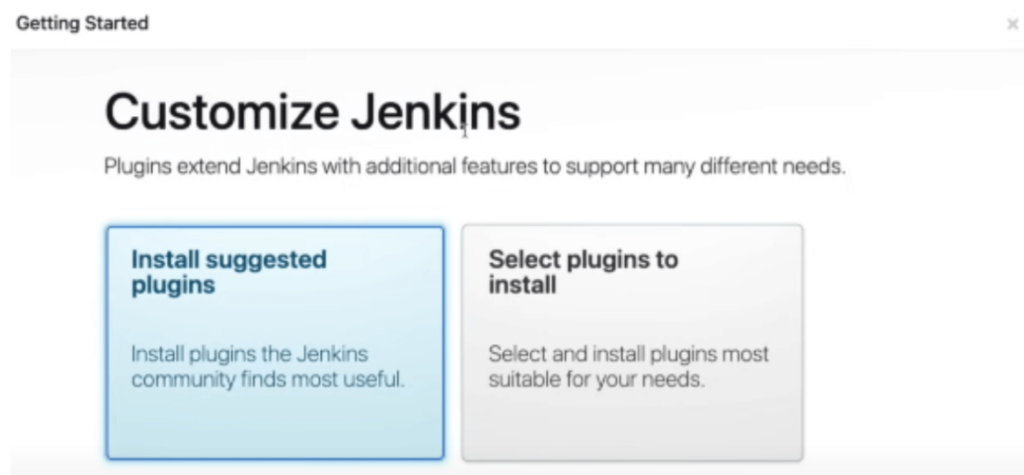
- Choose plugin installation method: install suggested plugins (recommended for beginners) or select specific plugins (for advanced users)
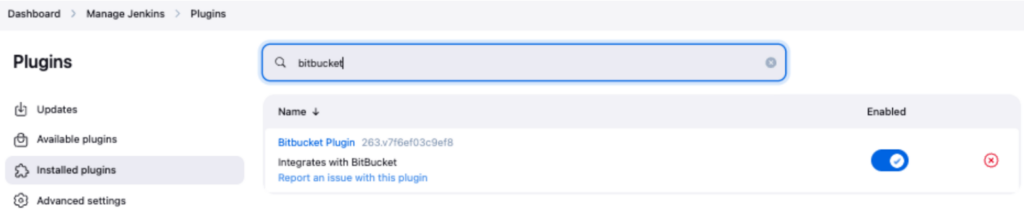
- Additionally, install the Bitbucket integration plugin for repository connectivity
Step 3: Set Up Jenkins Agent
1. Install Java on Agent similar to Master EC2
2. Install docker and add current user to the docker group
					# On the Agent EC2: Update package lists
sudo apt-get update

# Install Docker on the Agent
sudo apt-get install docker.io

# Check if Docker service is running
sudo systemctl status docker

# Add current user to the docker group to run Docker without sudo
sudo usermod -aG docker $USER

# Apply the new group membership without logging out
newgrp docker

# Verify Docker is working by listing running containers
docker ps
3. Install Astro CLI
					# Install Astronomer CLI on the Agent
curl -sSL install.astronomer.io | sudo bash -s
4. Add the Master’s public key to the Agent for secure communication:
					# On Agent: Navigate to SSH directory
cd ~/.ssh


# Update authorized_keys file with master public key
vim authorized_keys

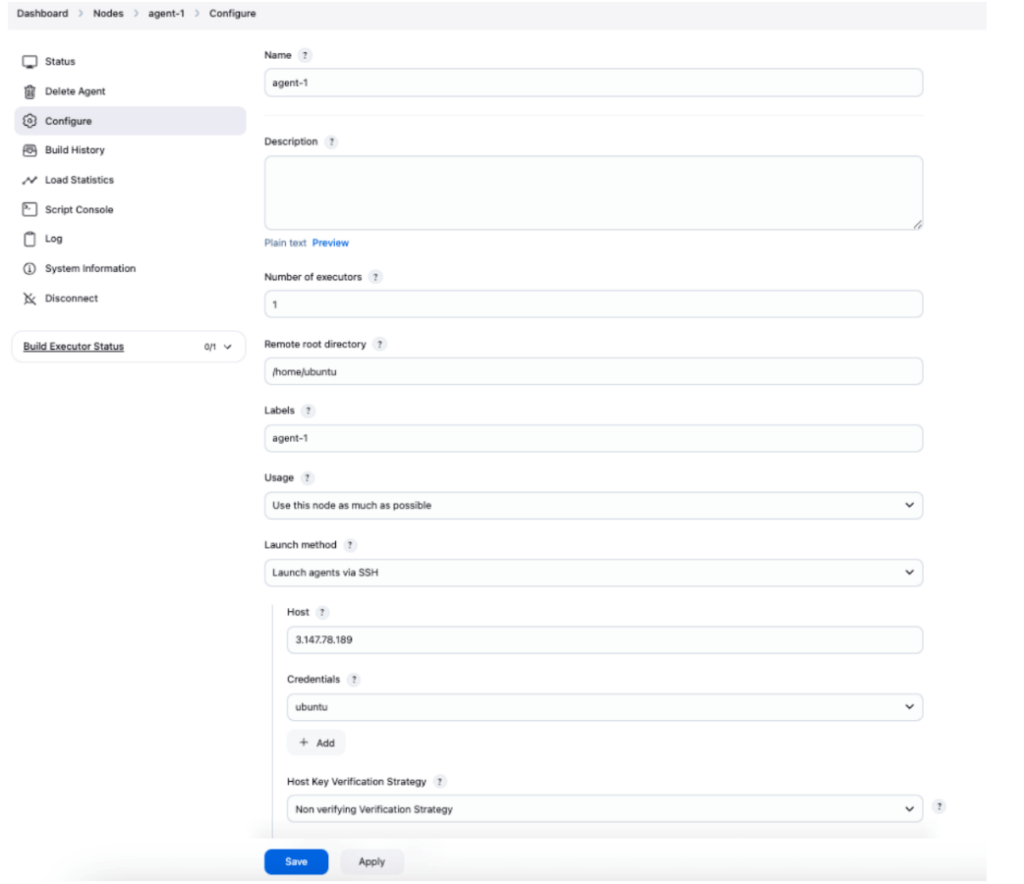
5. Add an Agent to Jenkins through the web interface:
- Navigate to "Manage Jenkins" > "Manage Nodes and Clouds"
- Select "New Node" and provide a descriptive name (e.g., "agent1")
- Configure the agent with these important settings:
- Remote root directory: Specify a work directory on the Agent
- Host: Enter the Agent EC2 instance’s public IP address
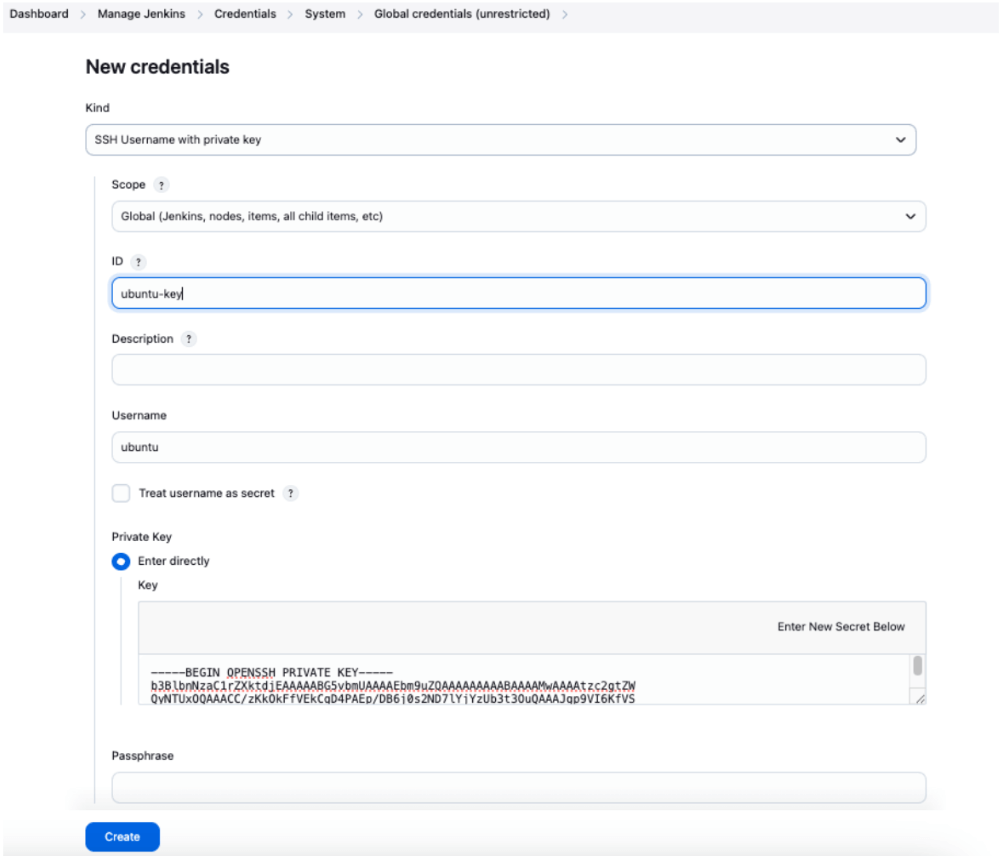
- Credentials: Create new SSH credentials using the Master’s private key
- Connection type: Select “SSH Username with private key”
- Verify and test the connection before saving
- Host Key Verification Strategy: Select “Non verifying Verification Strategy” to bypass SSH host key verification
Step 4: Set Up Integration
1. Configure Bitbucket Webhook
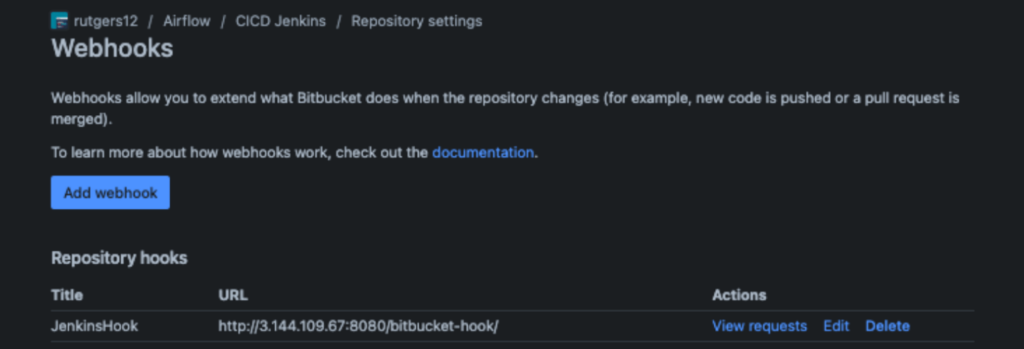
In your Bitbucket repository settings:
- Navigate to Repository Settings > Webhooks > Add webhook
- Enter the webhook URL: http://<master-ec2-public-ip>:8080/bitbucket-hook/
- Configure appropriate triggers (typically repository push events)
- Save the webhook configuration
2. Add Bitbucket Credentials to Jenkins
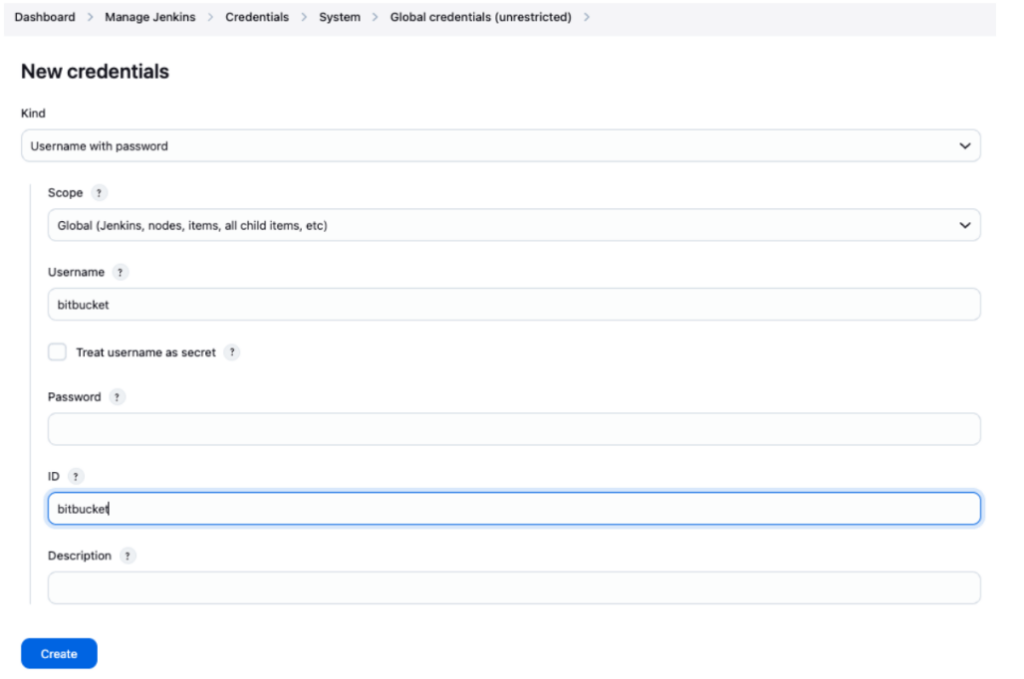
In Jenkins, go to “Manage Jenkins” > “Manage Credentials”. Add new credentials with these settings:
- Credential type: Username with password
- ID: bitbucket (use exactly this ID for pipeline reference)
- Username: Your Bitbucket username
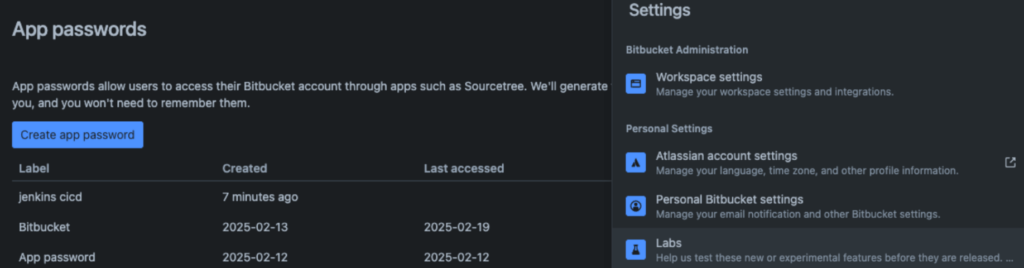
- Password: Your Bitbucket app password (create one with appropriate permissions)
Important: Record this app password securely as it will only be displayed once.
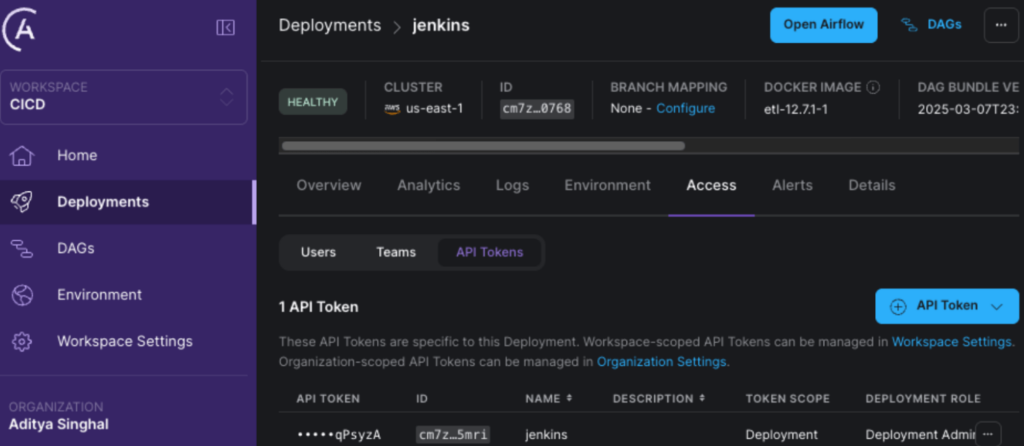
3. Add Astronomer API Token to Jenkins
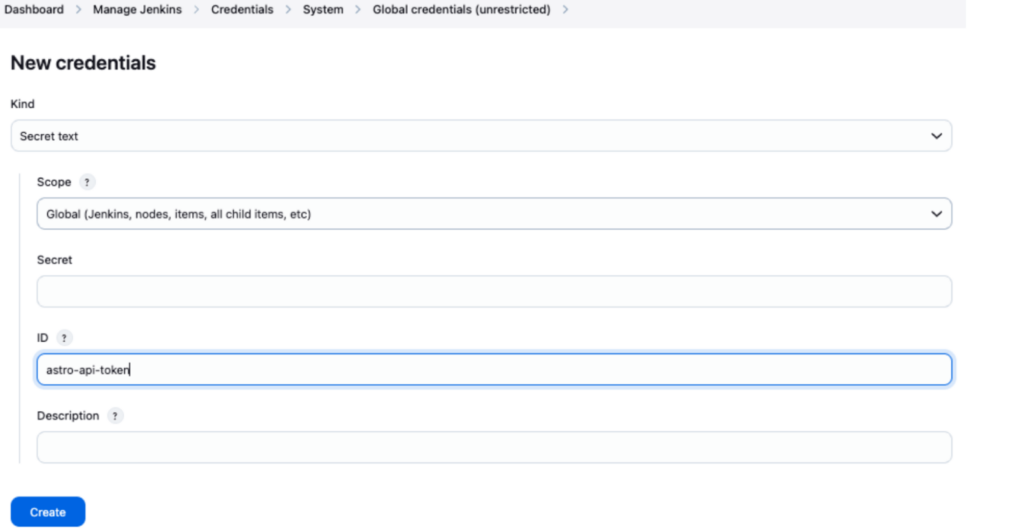
Obtain your API token from the Astronomer web interface. In Jenkins, create a new secret text credential:
- Credential type: Secret text
- ID: astro-api-token (use exactly this ID for pipeline reference)
- Secret: Your Astronomer API token
- Description: Optional but helpful for identification
Step 5: Create and Configure Pipeline
1. Create Jenkins Pipeline
- Create a new pipeline job in Jenkins and use this Groovy template as your pipeline script:
					pipeline {
    environment {
        ASTRO_API_TOKEN = credentials('astro-api-token')
    }
    agent any
    stages {
        stage("Checkout") {
            steps {
                checkout scmGit(
                    branches: [[name: '*/main']],
                    extensions: [],
                    userRemoteConfigs: [[
                        credentialsId: 'bitbucket',
                        url: 'https://aditya12singhal@bitbucket.org/rutgers12/cicd-jenkins.git'
                    ]]
                )
            }
        }
        stage("Testing") {
            steps {
                echo "Testing completed"
            }
        }
        stage('Deploy to Astro Dev') {
            steps {
                sh '''
                    export ASTRO_API_TOKEN=${ASTRO_API_TOKEN}
                    astro deploy cm7zfpqgp0e7p01idlfkv0768 --dags --force
                '''
            }
        }
    }
}
Important: Customize the pipeline by replacing:
- your-username@bitbucket.org/your-org/your-repo.git with your actual Bitbucket repository URL
- your-deployment-id with your Astronomer deployment ID
2. Configure Pipeline Triggers
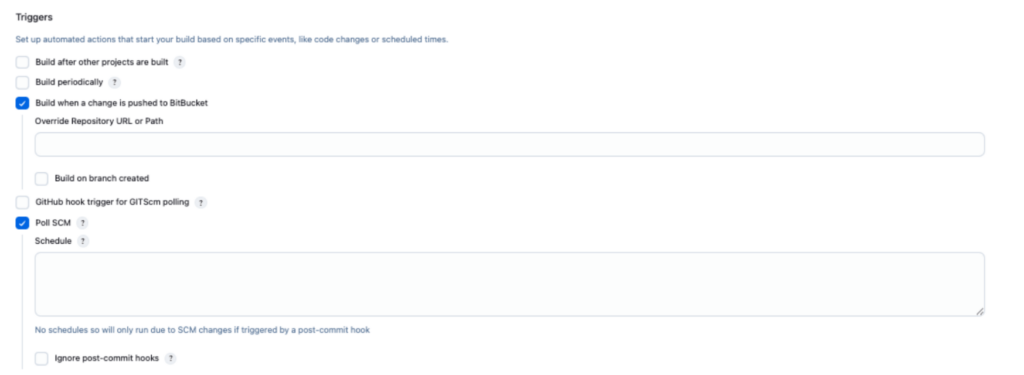
- In the pipeline configuration, locate “Build Triggers” section
- Enable “Bitbucket Push and Pull Request” option
- Check the “Poll SCM” option and set up a schedule (e.g., “H/5 * * * *” for checking every 5 minutes)
- Configure any additional trigger settings as needed
- Save the configuration
Note: “Poll SCM” serves as a backup trigger mechanism that periodically checks the repository for changes, ensuring builds are triggered even if webhook delivery fails.
Author

Data Engineer