Share this on:
What You'll Learn
This technical blog outlines step-by-step process for integrating Bitbucket with Informatica Intelligent Data Management Cloud (IDMC), managing version control, and deploying code across environments using Git-based workflows.
Setting Up Username and Password for New User
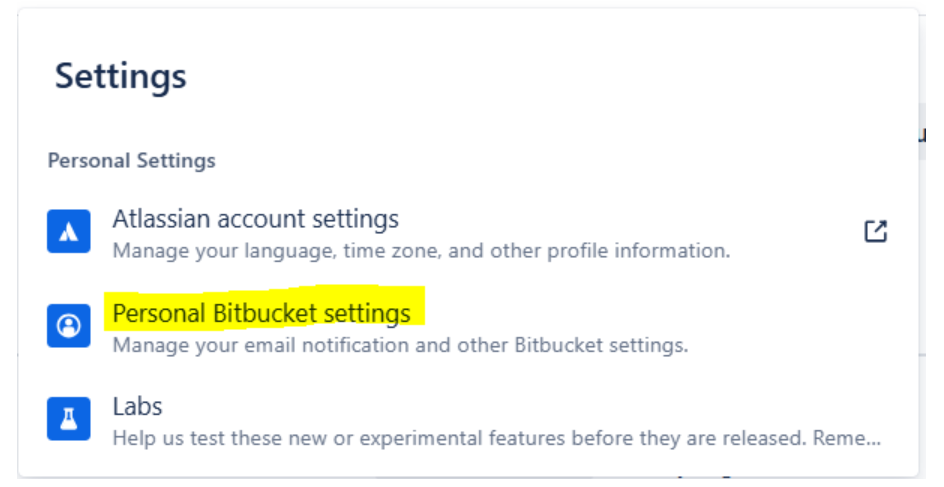
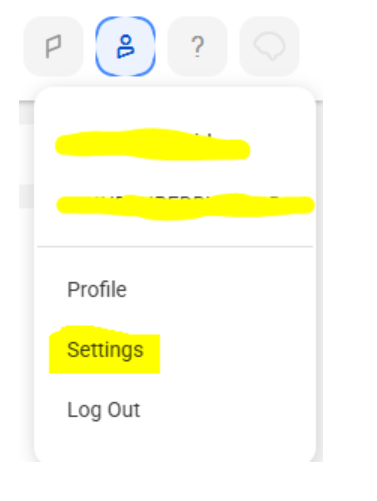
Access your Bitbucket console and go to Settings.

Navigate to Personal Bitbucket Settings.
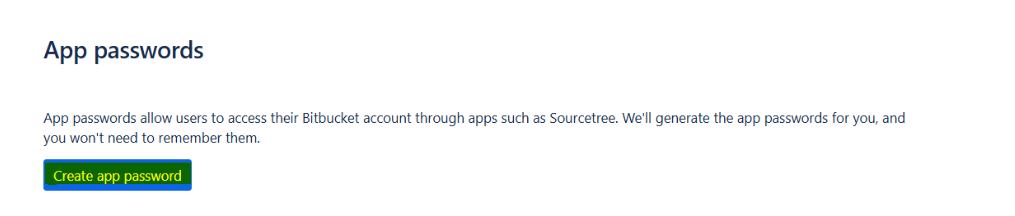
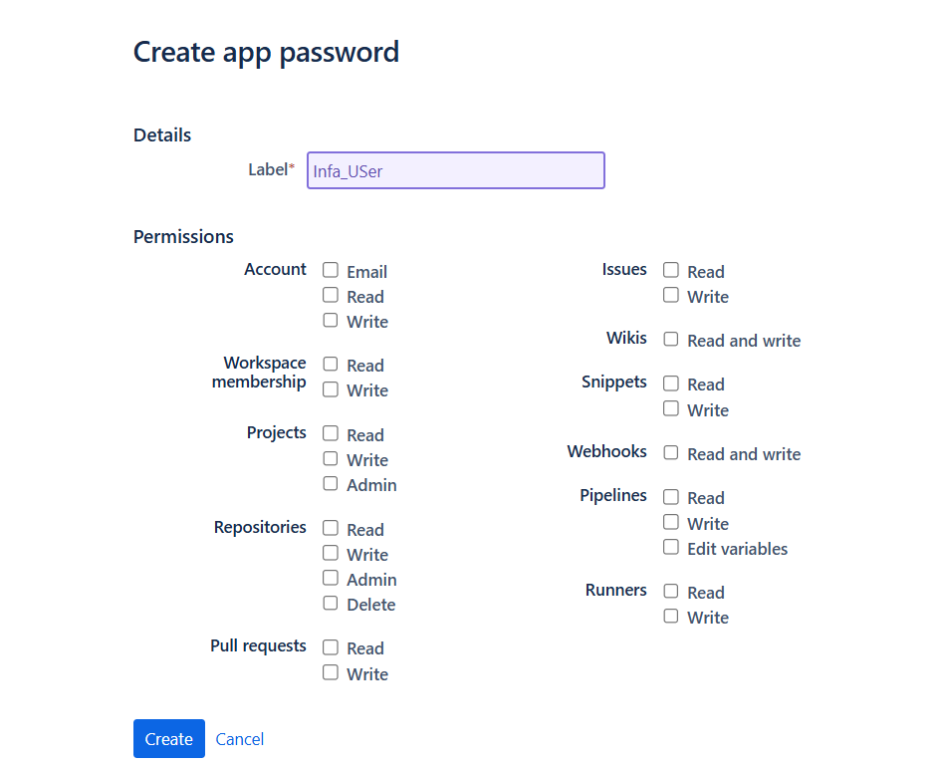
- To create a new password, go to App passwords and select Add app password.
- Assign a suitable label and choose the permissions you want to grant.
- Click Create to generate the password.
- Be sure to store the generated password securely, as it will only be displayed once.
3. Integrating Bitbucket Users with Informatica IDMC
- Log in to your Informatica IDMC account with your username and password.
- Access the Settings menu.
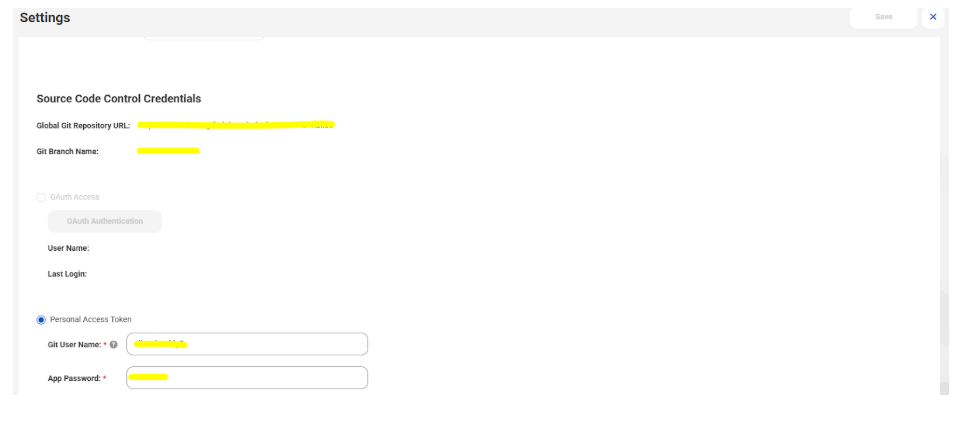
- Locate Personal Access Token and input your Git username and app password.
- Click Save to apply and store the changes.
4. Checking In an Object
- Check in an object to add it to the source control repository or to update the repository with the latest version of the object in the organization. If no changes have been made to the object, the check-in will not be reflected in the source control history, and a new version will not be created in the repository.
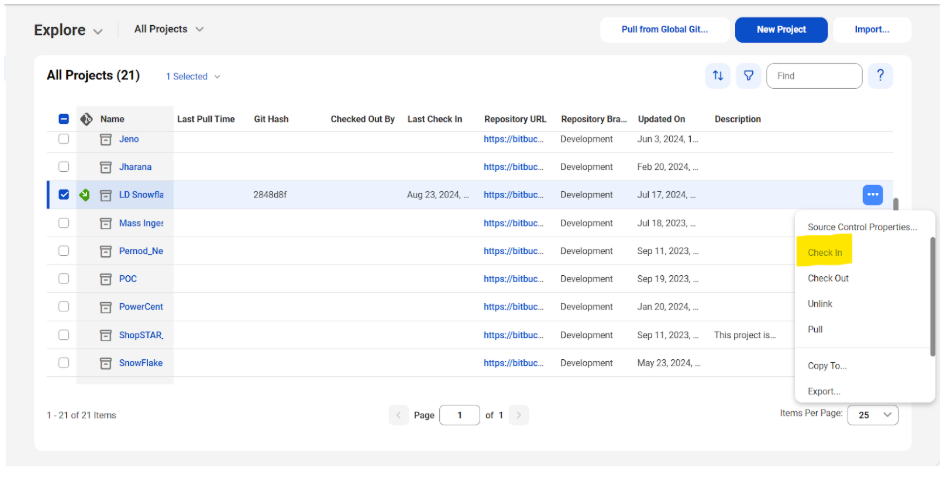
- On the Explore page, locate the object you want to check in.
- In the row containing the object, click Actions and select Check In.
-
If checking in multiple objects, review the results on the preview page under the Status column.
- To exclude an object, uncheck the box next to its name.
- To cancel the action, close the page.
- Enter a summary (required, max 255 characters). Optionally, add a description and commit tag
- Click OK to complete the check-in.
Note: It is advisable to Check – In the corresponding mapping task while Checking In the mapping.
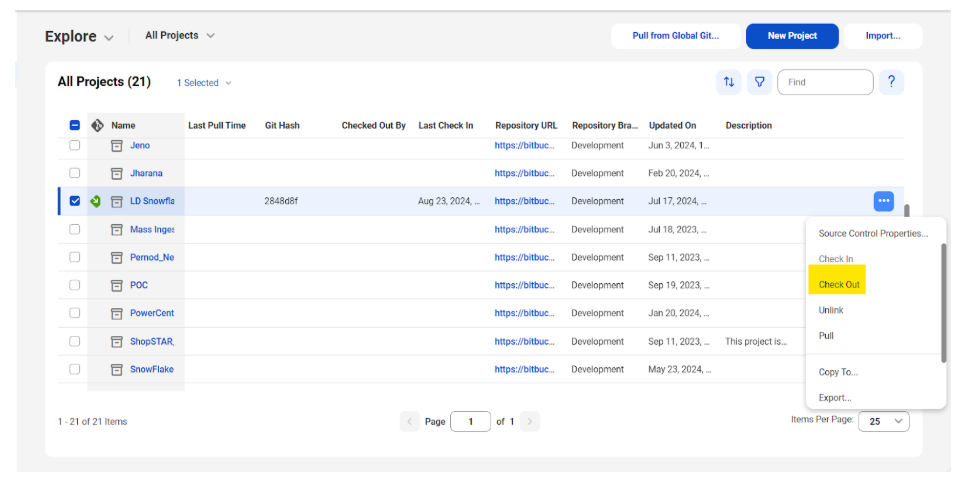
5. Checking Out an Object
- When an object is checked out, it is locked to prevent other users from making changes while it is being worked on.
- Users can check out individual objects, multiple objects, or an entire project/folder to include all objects within it. Updates to a Data Integration mapping with associated mapping tasks will automatically deploy to those tasks, regardless of whether the tasks are checked out.
- On the Explore page, locate the object to be checked out.
- In the object's row, click Actions and select Check Out.
-
If checking out multiple objects, review the results on the preview page under the Status column.
- To exclude an object, uncheck the box next to its name.
- Click Check Out to complete the process.
Note: It is advisable to Check – Out the corresponding mapping task while Checking Out the mapping.
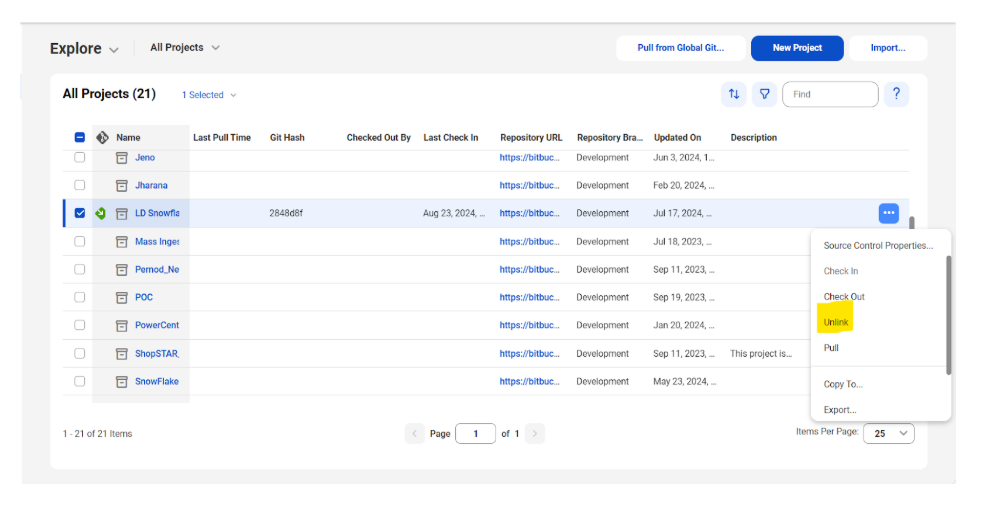
6. Unlinking an Object
- To unlink an object and remove it from source control.
- Unlinking an object prevents further updates to the repository from that object but does not delete the object from the source control repository or the organization.
- Ensure the object is checked in before proceeding with unlinking.
- An object checked out by another user can be unlinked if the user has the Admin role or the Force Undo Checkout privilege for the Administrator service.
- A project or folder containing source-controlled objects cannot be unlinked directly. Each object within the project or folder must be unlinked individually before unlinking the project or folder itself.
- On the Explore page, locate the object to be unlinked.
- In the row of the object, click Actions and select Unlink.
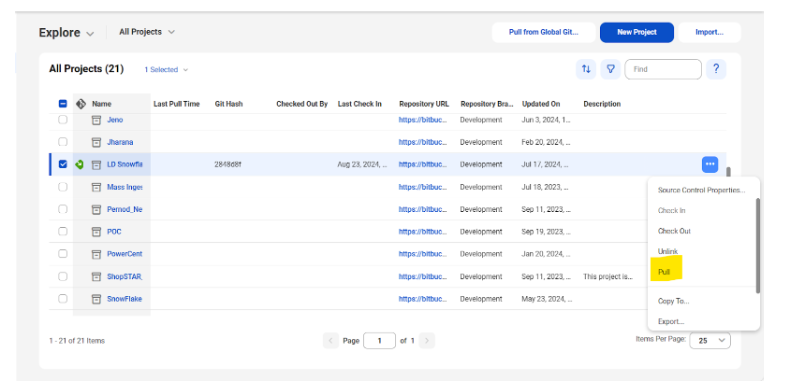
7. Pulling an Object
- Use the pull action to update the organization with objects from the source control repository. It is possible to pull a single asset, a project, or a folder. When pulling a project or folder, specific assets can be excluded if desired.
- To pull a project from the global repository, click Pull from Global Git. Select the project containing the objects to be pulled and click Next.
- To pull a project from a repository or branch configured at the project level, navigate to the Explore page, select the asset or folder, click Actions, and choose Pull.
- Note that only one project can be pulled at a time.
- To pull a single asset or folder, go to the Explore page, select the asset or folder, click Actions, and choose Pull.
-
For a project or folder, choose the pull method:
- Pull all assets in a commit hash.
- Only pull modified assets in a commit hash.
- Select the desired Git hash to pull and click Next.
- Review the list of assets. Uncheck any assets that should not be included in the pull (all assets are selected by default).
- Check the actions listed in the Status column for each asset. These actions will be performed during the pull.
- If an asset requires a connection, select a target connection or accept the default. Note that a new connection cannot be created during the pull process.
- If an asset requires a runtime environment, select a target runtime environment or accept the default. Creating a new runtime environment is not possible during the pull process.
- If needed, select Publish Taskflow(s) after pull to publish taskflows following the pull.
- Optionally, click Test to check for potential errors resulting from the pull.
- Click Pull to proceed with the action.
- The pull action will generate a log with details of the process. This log can be viewed on the Source Control Logs page in Monitor.
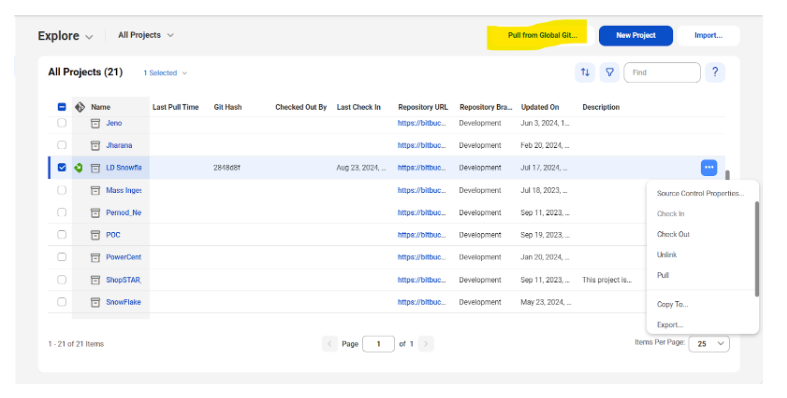
8. Pulling from the Global Git Repository
- Pull from Global Git is a feature in Informatica IDMC that allows synchronization of your IDMC environment with the global Git repository, updating your local environment with the latest changes from the global repository.
- Navigate to the Explore page or the section where projects and assets are managed.
- Click Pull from Global Git.
- Select the project from the global Git repository that contains the assets to be pulled.
- Click Next.
- Choose the Git commit hash for the pull operation.
- Review the list of assets and uncheck any that should not be included. Click Pull to execute the action.
- Click Pull to execute the action.
9. Code Deployment
- Step 1: Log in to the Informatica IDMC Development or Production environment.
- Step 2: Go to the "Explore" section.
- Step 3: Click on "Pull from Git Global Repository."
- Step 4: Choose the project folder you want to sync code from and review the details.
- Step 5: Create a Pull Request to merge changes from the feature or development branch into the main branch of the global Git repository.
- Step 6: Once the pull request is created, it must be reviewed and approved by the Root User or an authorized approver.
- Step 7: After approval, the Root User merges the pull request into the main branch of the global repository.
- Step 8: Upon successful merge, the code is officially part of the main branch and is considered deployed to the global environment.
- Step 9: Use the "Pull from Global Git" option in the target environment (e.g., Production) to bring the latest changes from the main branch into the environment.
Need help with Informatica Deployment? Choose LumenData
LumenData is a long-standing partner with Informatica. As a proud Informatica Platinum Enterprise Partner, we are currently leading the single, largest Informatica MDM SaaS Migration for a global cruise line. Read more here.
Check out LumenData’s Informatica cloud modernization services here.
Explore our Informatica- focused customer success stories here.
About LumenData:
LumenData is a leading provider of Enterprise Data Management, Cloud and Analytics solutions and helps businesses handle data silos, discover their potential, and prepare for end-to-end digital transformation. Founded in 2008, the company is headquartered in Santa Clara, California, with locations in India.
With 150+ Technical and Functional Consultants, LumenData forms strong client partnerships to drive high-quality outcomes. Their work across multiple industries and with prestigious clients like Versant Health, Boston Consulting Group, FDA, Department of Labor, Kroger, Nissan, Autodesk, Bayer, Bausch & Lomb, Citibank, Credit Suisse, Cummins, Gilead, HP, Nintendo, PC Connection, Starbucks, University of Colorado, Weight Watchers, KAO, HealthEdge, Amylyx, Brinks, Clara Analytics, and Royal Caribbean Group, speaks to their capabilities.
For media inquiries, please contact: marketing@lumendata.com.
Authors

Junior Data Analyst

Technical Manager

LumenData
Online · Typically replies instantly
How can LumenData help?
Hi! I'm the LumenData AI assistant. Ask me things like "What services do you offer?" or "Tell me about MDM"
Are you sure?
LumenData
Online · Typically replies instantly